#Overview
Scenomi can be used for scenario-based design, task analysis, and interaction design.
You can also use it to evaluate the utility (benefits, costs, and risks) of different scenarios, tasks, and interactions.
Used this way Scenomi helps you to understand which technologies or technology designs will provide the most value to their stakeholders.
Though Scenomi is designed to be used in different ways to support individual analysis needs,
the standard approach to Scenomi modeling is to:
- Create models to organize your different analyses.
- Identify and create scenario groups.
- Identify and create scenarios of technology use.
- Break down scenarios into specific tasks through task analysis.
- Identify certain tasks as technology interactions.
- Identify the actors, technology, data, and methods participating in an interaction.
- Identify the benefits, costs, and risks (i.e., utility) associated with different technology interactions.
- Quantify (if possible) these benefits, costs, and risks to measure the relative utility of different technology interactions.
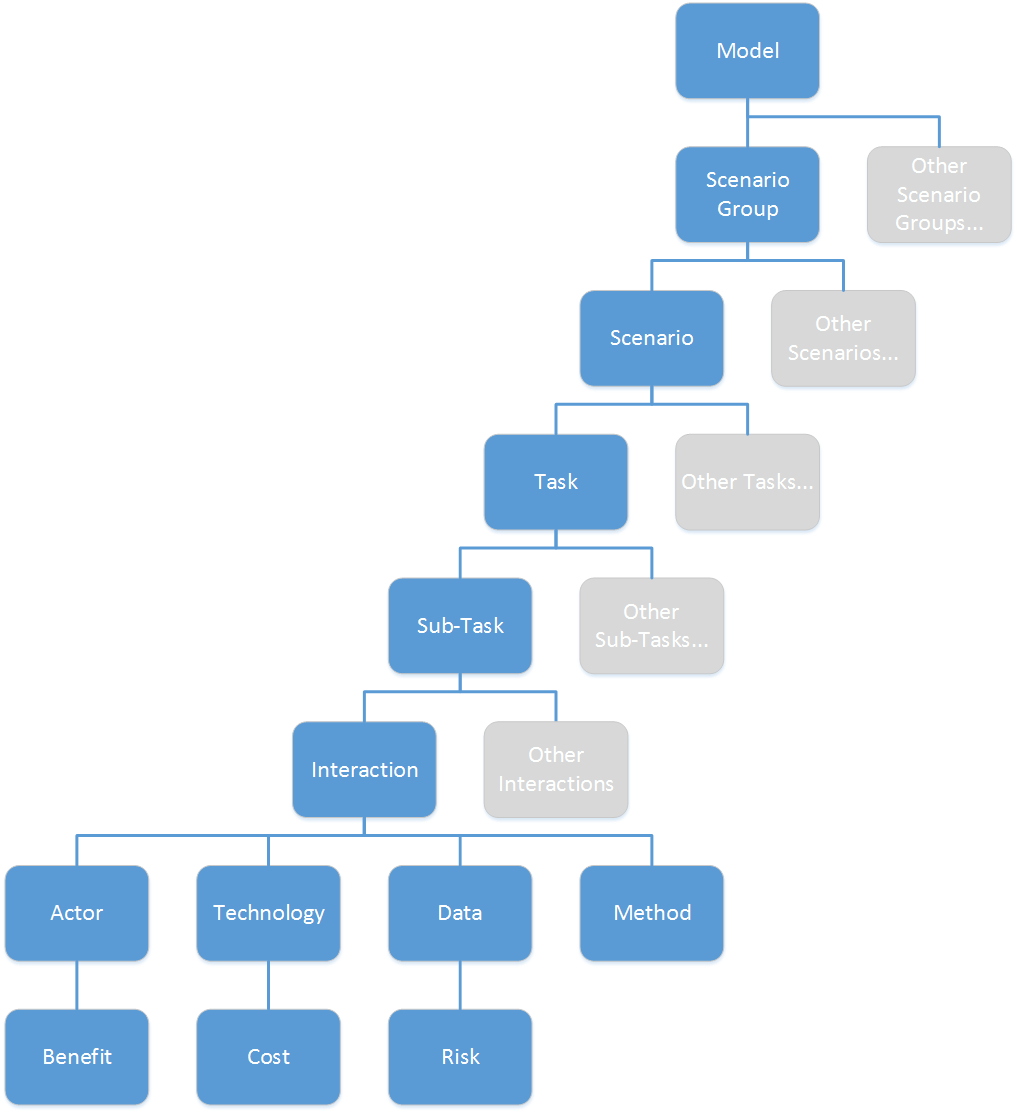
A Scenomi model fragment looks something like the hierarchy shown below, though different models can takes many different forms and not all parts are required to create a useful model.

A complete Scenomi model might consist of many branches similar to the one shown above.
Typically a Scenario is broken down through hierarchical tasks analysis to show the discrete tasks that occur as part of the scenario.
When a task involves interactions with a technology, you can show the actors (people) technology, and any data or methods that participate in the interaction.
A method describes a particular way to do a task, such as pressing a button or moving a slider.
See below for more detail on each of the Scenomi model elements.
#Getting Started
This section will cover some of the most common tasks and activities in Scenomi.
The section following provides a Reference with more detail on the application's features.
Scenomi Projects
In Scenomi, a Project is a collection of related Models and other components.
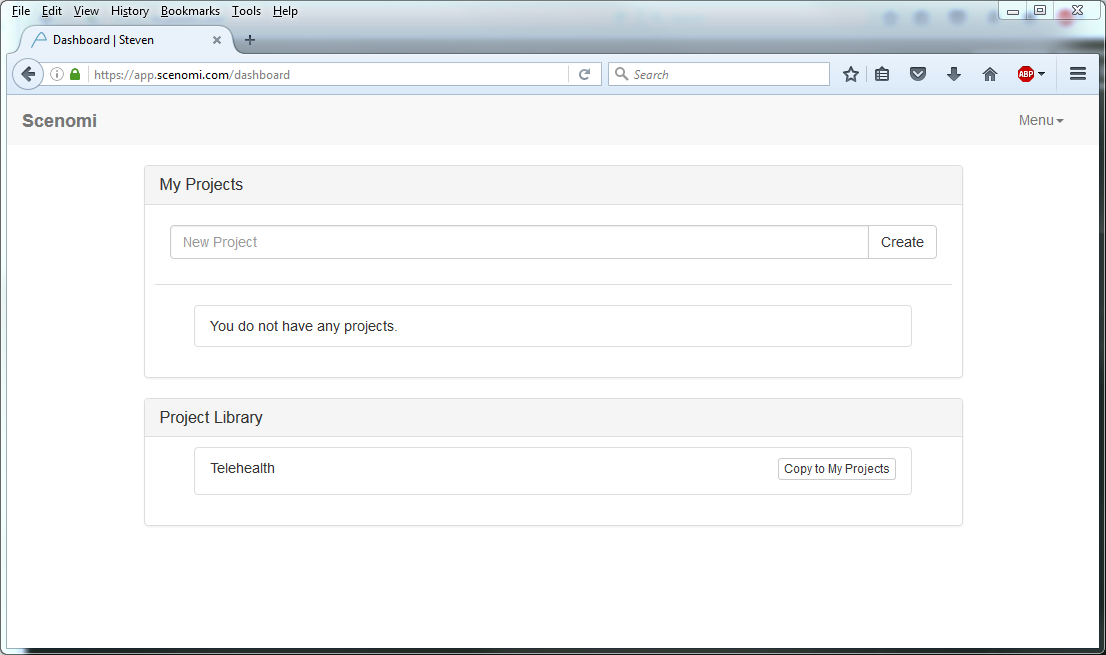
When you log in to Scenomi you arrive at the Project Dashboard as shown below.

Just enter a project name in the New Project field and press the Create button.
The My Project panel lists projects you have created or added from the Project Library.
The Project Library panel contains any public projects that are available for you to add to your own Project Library.
Modeling Scenarios
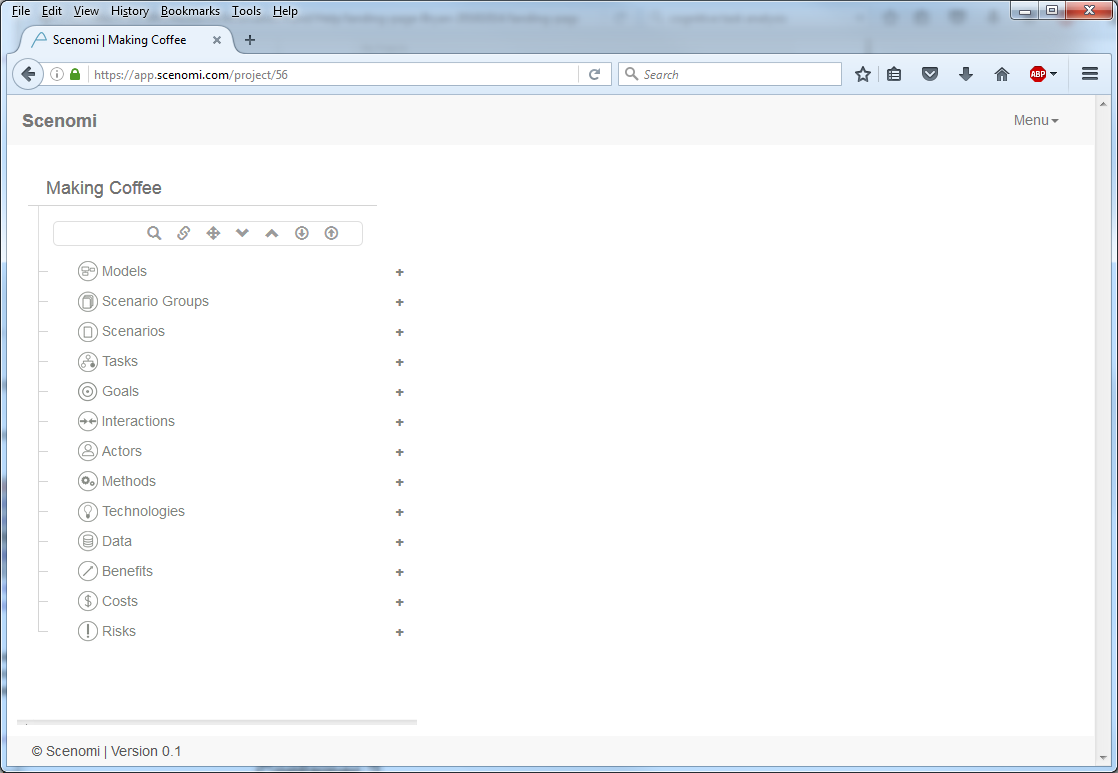
After creating a new project you arrive on the Project Landing Page shown below.

You can start modeling by pressing the + button to the right of any of the model elements.
You can work from the top down, from the bottom up, or begin creating elements anywhere you like.
You can always drag and drop elements where they are needed.
You could start by creating a Scenario.
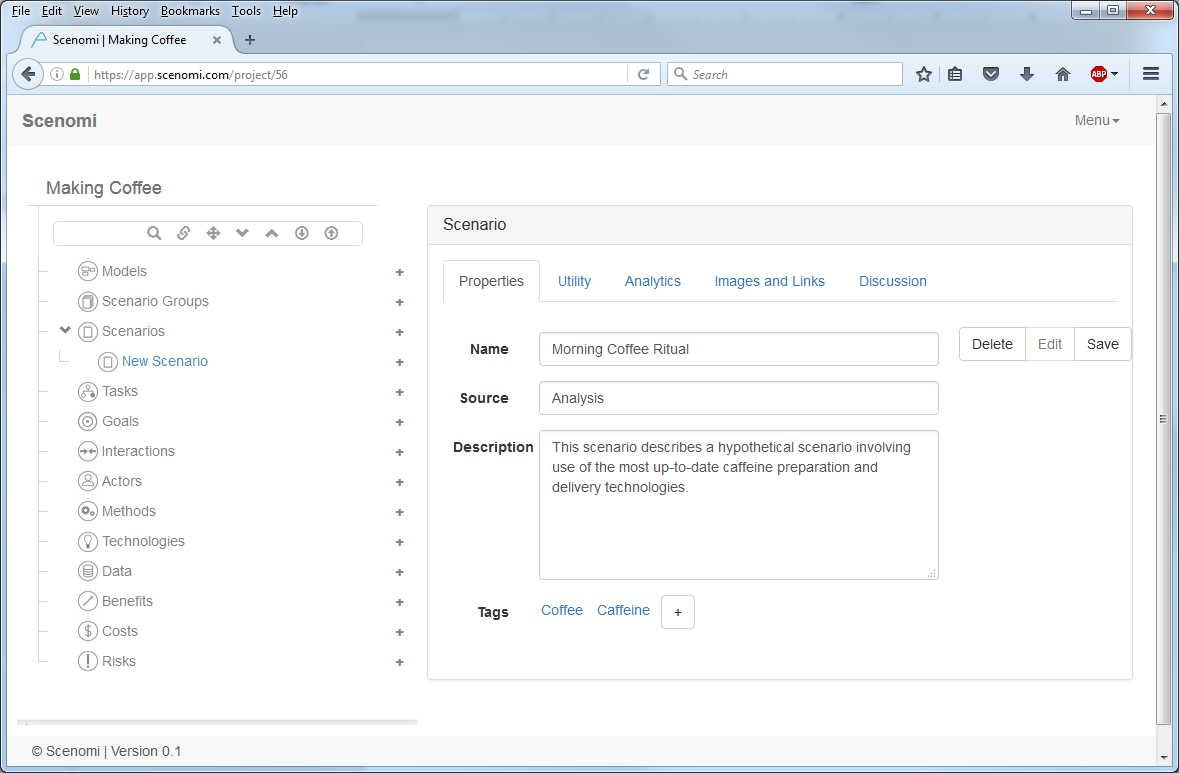
Press the + button to the right of Scenario to arrive at the Scenario Properties page as shown below.

In the instance above a Scenario has been created to represent a specific event in the program being analyzed
for technology support, in this case Morning Coffee Ritual.
The Name and Description fields capture information about the scenario.
The Source field is used to document the origin of the Scenario, where it came from.
All Scenomi model elements include a Source field to keep track of why they are included in the model.
Once a Scenario is created you can identify some of the tasks that occur as part of the Scenario.
Click on the + button to the right of the Morning Coffee Ritual scenario
to start identifying the underlying tasks.
